
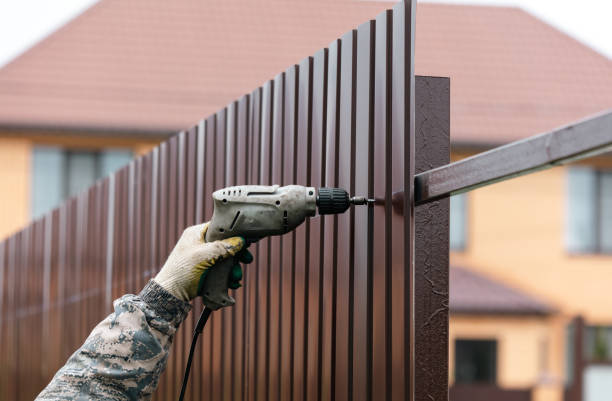
A cedar fence can provide a natural, durable boundary for a residential or commercial property. Over time, however, sun exposure, rain, moisture, dirt, and changing temperatures can cause the original stain to fade or wear unevenly. When this happens, restaining the fence can help refresh its appearance and maintain the wood’s protective finish.
Restaining cedar fence surfaces is not simply a matter of applying a new coat of stain. The condition of the existing wood and finish should determine how the project is prepared. A fence with minor fading may need cleaning and a maintenance coat, while a heavily weathered fence may require more extensive preparation before a new stain is applied.
Understanding the correct process can help homeowners avoid uneven color, poor stain absorption, peeling finishes, and unnecessary repeat work. This guide explains how to inspect, prepare, clean, and restaining cedar fence while considering the factors that affect the final result.
For property owners evaluating the overall condition of their fencing, Preferred Fencing LLC can also provide information about fence-related maintenance, repair, and installation needs.
When Does a Cedar Fence Need Restaining?
The right time for restaining cedar fence surfaces depends on the fence’s exposure and the type of finish previously applied. There is no single schedule that works for every property.
A fence exposed to strong sunlight, frequent rain, or high moisture may require maintenance sooner than a fence in a more protected location. The direction the fence faces can also make a difference. One side may receive several hours of direct sunlight each day, while another remains shaded and experiences different moisture conditions.
Common signs that a cedar fence may need attention include:
- Noticeable fading of the existing color
- Uneven or patchy stain coverage
- Wood that absorbs water quickly
- Areas where the previous finish has worn away
- Surface dirt, mildew, or discoloration
- A dry or weathered appearance
- Differences in color between heavily exposed and protected sections
A visual inspection can help determine whether the fence needs simple cleaning, a maintenance coat, or more extensive cedar fence restoration.
How to Check Whether Your Cedar Fence Is Ready for Restaining
Before purchasing stain or preparing the fence, inspect the entire structure.
Walk along both sides and look closely at the boards, posts, gates, and lower sections. Pay attention to areas near the ground because they may experience greater moisture exposure. Gates and high-use sections should also be checked for movement or physical damage.
Perform a Water Absorption Check
One simple observation involves placing a small amount of water on the wood surface.
If water remains on the surface for an extended period, the existing finish may still be limiting absorption. If the wood absorbs the water quickly, the protective finish may be worn.
This observation does not replace the stain manufacturer’s application guidance, but it can help identify differences in the condition of the fence.
Look for Damage That Stain Cannot Fix
Stain can improve the appearance of weathered wood, but it cannot repair structural damage.
Check for:
- Cracked or split boards
- Loose boards or fasteners
- Rot or significant decay
- Damaged posts
- Warped sections
- Loose gates
- Areas with extensive insect damage
Complete necessary repairs before applying a new finish. Applying stain over damaged wood may improve the color temporarily without addressing the underlying issue.
What Do You Need Before Restaining a Cedar Fence?
Having the right materials available can make the process more organized and reduce interruptions during application.
The exact supplies depend on the fence condition and the type of stain being used.
Essential Tools and Materials
| Item | Purpose |
|---|---|
| Exterior wood cleaner | Removes dirt, environmental buildup, and surface contamination |
| Soft or medium-bristle brush | Helps clean the wood without unnecessarily damaging the surface |
| Garden hose or suitable rinsing equipment | Removes cleaner and loosened debris |
| Drop cloths | Protect nearby surfaces and landscaping |
| Sandpaper or sanding equipment | Smooths rough areas when surface preparation is needed |
| Wood stain | Provides the selected color and protective finish |
| Stain brush | Allows detailed application around edges and boards |
| Roller or stain pad | Helps cover larger, accessible fence sections |
| Sprayer, if appropriate | Can speed application when used correctly |
| Protective gloves and eyewear | Helps provide basic protection during cleaning and application |
Always review the instructions for the specific cleaner and stain before beginning. Different products can have different preparation, application, drying, and weather requirements.
Choose the Right Stain Before You Start
Selecting the right product is an important part of cedar fence staining. The best choice depends on the appearance you want and the condition of the wood.
Transparent Stain
Transparent stain provides limited pigment and allows most of the natural cedar color and grain to remain visible.
This type may be suitable when the wood is in good condition and the goal is to preserve a highly natural appearance.
However, because cedar naturally varies in color, transparent products may produce noticeable variation between boards.
Semi-Transparent Stain
Semi-transparent stain provides more visible color while allowing much of the cedar grain to remain visible.
For many cedar fences, this can provide a balance between maintaining the natural character of the wood and refreshing the overall appearance.
Semi-transparent products are often considered when the existing finish has faded but the wood still has an attractive surface.
Solid Stain
Solid stain provides more consistent color coverage and can help reduce the visibility of differences between boards.
It may be considered when a fence has significant discoloration or when the property owner wants a more uniform finish.
The main tradeoff is that solid finishes can conceal more of cedar’s natural grain.
When selecting a product for restaining cedar fence surfaces, consider the existing coating. Not every stain can be applied successfully over every previous finish. Compatibility and proper preparation should be checked before starting.
Step 1: Inspect and Repair the Cedar Fence
Begin with a complete inspection.
Look for structural concerns before focusing on appearance. Replace or repair damaged components as needed.
Check the following areas carefully:
Fence Posts
Posts provide structural support. If a post is leaning, loose, or showing signs of significant deterioration, staining alone will not solve the problem.
Fence Boards
Look for boards that are cracked, split, warped, or loose. Minor surface imperfections may be addressed during preparation, but severely damaged boards may need replacement.
Gates
Gates often experience more movement than fixed fence panels. Check hinges, latches, alignment, and the condition of the wood before beginning the staining process.
For larger repair concerns, Preferred Fencing LLC may be a useful resource when evaluating whether maintenance or replacement work is needed before refinishing the cedar.
Step 2: Clean the Fence Thoroughly
Cleaning is one of the most important stages of cedar fence restoration.
Over time, a fence can collect:
- Dirt and dust
- Pollen
- Cobwebs
- Mildew
- Organic debris
- Surface oils
- Environmental pollution
Applying stain over these materials can affect penetration and lead to inconsistent results.
Use a cleaning method appropriate for exterior cedar and follow the cleaner manufacturer’s instructions. Work systematically so that no sections are missed.
Why Proper Cleaning Matters
Stain needs a properly prepared surface to perform as intended.
If one section is heavily soiled while another is relatively clean, the new stain may absorb differently. This can create noticeable differences in color.
Pay particular attention to shaded areas and lower boards, as they may accumulate more moisture and organic material.
After cleaning, rinse according to the product instructions and allow the cedar adequate time to dry.
Step 3: Decide Whether the Old Stain Needs to Be Removed
Not every restaining project requires complete removal of the previous finish.
The correct approach depends on the type and condition of the existing coating.
If the previous stain has simply faded and remains compatible with the new product, cleaning and applying a maintenance coat may be possible.
However, more extensive preparation may be needed when the old finish is:
- Peeling or flaking
- Thick and non-penetrating
- Unevenly worn
- Incompatible with the new stain
- Covering significant surface contamination
When Sanding May Help
Light sanding may help smooth rough areas and remove loose surface material.
Do not assume that sanding alone will remove every type of old coating. The preparation process should match the existing finish and the new stain manufacturer’s requirements.
After sanding, remove dust before staining.
When Stripping May Be Necessary
Some old finishes must be removed before a new penetrating stain can be applied successfully.
Wood stripping products should be selected and used according to their instructions. Because these products can vary, the preparation process should be based on the specific coating being removed.
Step 4: Allow the Cedar to Dry Completely
Cedar should be adequately dry before applying a new stain.
After cleaning or rain, moisture inside or on the surface of the wood can affect how stain is absorbed.
Drying time depends on factors such as:
- Recent weather
- Humidity
- Temperature
- Fence location
- Airflow
- Sun exposure
Avoid relying on a fixed number of hours for every situation. Follow the stain manufacturer’s requirements and consider the actual weather conditions around the property.
Staining wood that is too wet can result in poor penetration and an inconsistent finish.
Step 5: Protect Landscaping and Nearby Surfaces
Before opening the stain, protect surfaces that should not be coated.
Move outdoor furniture and other removable items away from the work area. Use drop cloths where appropriate to protect patios, walkways, and nearby features.
Take care around:
- Plants and shrubs
- Siding
- Concrete
- Stone
- Outdoor furniture
- Gates and hardware
If using a sprayer, overspray should be considered carefully. Wind conditions can carry stain beyond the intended area.
Preparing the work area before application can make cleanup easier and help create a more controlled result.
Step 6: Apply the New Cedar Stain
Once the fence is clean, repaired, prepared, and adequately dry, the staining process can begin.
Start by stirring or mixing the product according to the manufacturer’s instructions. Pigments can settle, which may affect color consistency if the stain is not properly mixed.
Work in Manageable Sections
Apply stain to a logical section at a time.
Where possible, complete an entire board or continue to a natural break. Stopping in the middle of a board can create visible lap marks.
Maintain a consistent application method throughout the project.
Use the Appropriate Application Tool
Brushes can provide good control around edges and detailed areas. Rollers and pads may help with larger sections. Sprayers can cover broad surfaces efficiently but require careful control and may need back-brushing or other steps depending on the product instructions.
The best tool depends on the fence design and the specific stain being used.
Avoid Overapplication
Applying more stain than the wood can absorb does not necessarily produce a better result.
Excess product may dry unevenly or remain on the surface, depending on the stain formulation. Apply the product according to its coverage and application instructions.
This is one of the most important considerations when restaining cedar fence surfaces because an even finish depends on both surface preparation and controlled application.
Step 7: Check the Fence for Uneven Areas
After application, inspect the fence while working through the project.
Look for areas that appear:
- Too light
- Too dark
- Dry or uneven
- Missed around edges
- Different from surrounding boards
Address issues according to the product’s application guidance.
Do not apply additional coats simply because a section looks darker or lighter before the product has fully dried. Wet stain can look different from the final cured appearance.
Allow the recommended drying time before making a final assessment.
Common Mistakes to Avoid When Restaining Cedar Fence Surfaces
Skipping the Inspection
Do not begin staining without checking the condition of the structure.
Loose or damaged boards, failing posts, and gate problems should be addressed separately.
Staining Over a Dirty Surface
Dirt and organic buildup can affect stain absorption.
Cleaning should be treated as an essential step rather than an optional one.
Ignoring Old Finish Compatibility
A new stain may not perform properly over every existing coating.
Check whether the products are compatible and determine whether additional preparation is required.
Staining Wet Wood
Wood that has not dried adequately may not absorb stain consistently.
Consider recent cleaning, rain, humidity, and the product’s requirements before application.
Choosing a Stain Only by the Sample Label
The same color can look different on cedar depending on the natural wood tone, age, weathering, and outdoor lighting.
Testing a small area can provide a better indication of the final result.
Applying Too Much Product
Excess stain can create uneven results.
Follow the manufacturer’s recommended coverage and application method.
Forgetting About Weather
Rain, excessive moisture, unsuitable temperatures, and strong wind can affect the project.
Check both current and expected weather conditions before starting.
How Long Does It Take to Restain a Cedar Fence?
The total project time depends on several factors.
A small fence with minimal preparation may take less time than a large, heavily weathered fence that requires cleaning, repairs, old finish removal, and multiple stages of preparation.
The process can include:
- Inspection
- Repairs
- Cleaning
- Rinsing
- Drying
- Surface preparation
- Protecting nearby areas
- Stain application
- Final drying and inspection
Drying time can add significantly to the overall project schedule. The work should not be rushed simply to complete the project in one day.
How Often Should You Restain a Cedar Fence?
The answer depends on the local environment and the condition of the finish.
Sun exposure, rainfall, humidity, temperature changes, fence orientation, and the type of stain all influence maintenance needs.
Instead of waiting for severe deterioration, inspect the fence periodically.
Look for:
- Fading
- Uneven color
- Water absorption
- Surface wear
- Weathered wood
- Damage around posts and gates
Routine inspections can help identify when maintenance may be needed.
Property owners can also consider local environmental conditions when planning cedar fence maintenance. Differences in sunlight, moisture, seasonal weather, and surrounding landscaping can cause one section of the same fence to age differently from another.
How Local Conditions Affect Cedar Fence Restaining
Cedar fencing is exposed to the specific weather conditions of its location. GEO-focused fence maintenance means evaluating the property itself rather than assuming every fence will age at the same rate.
For example, a fence exposed to long periods of direct sunlight may fade differently than one surrounded by mature trees. A shaded section may retain moisture longer, while a section near a sprinkler system may experience repeated water exposure.
Before restaining, consider:
- Which fence sections receive the most sunlight
- Whether vegetation touches the fence
- Whether sprinklers regularly wet the boards
- Where water collects after rain
- Which areas receive limited airflow
- Whether one side of the fence is more exposed to local weather
These details can help homeowners plan more targeted maintenance and identify sections that may need additional attention.
For property owners seeking assistance with fencing concerns in their local service area, Preferred Fencing LLC can help evaluate fence-related maintenance, repair, or replacement needs based on the condition of the existing structure.
When Should You Consider Professional Fence Assistance?
Some restraining projects can be handled through routine maintenance, but others involve more complicated issues.
Professional assistance may be useful when:
- The fence has widespread structural damage
- Posts are leaning or deteriorating
- The old finish is difficult to remove
- Large areas require consistent preparation
- Access to the fence is difficult
- Multiple repairs are needed before staining
- You are unsure whether the fence should be repaired or replaced
A professional evaluation can help separate appearance concerns from structural concerns.
Preferred Fencing LLC can be considered when property owners need information about fencing services, repairs, replacement, or other fence-related work. Reviewing the overall condition of the fence before investing time in refinishing can help determine the most appropriate approach.
Conclusion
Restraining cedar fence surfaces requires more than applying a new color over the existing finish. The best results begin with inspecting the structure, completing necessary repairs, cleaning the cedar, addressing incompatible or damaged coatings, and allowing the wood to dry adequately.
Choosing the right stain opacity and preparing the surface correctly can help create a more even and durable-looking finish. Regular inspections after the project can also help homeowners identify fading, moisture exposure, and other signs that future maintenance may be needed.
Because local weather, sunlight, landscaping, and fence condition can all affect the process, it is important to evaluate each property individually. For help with fence maintenance, repairs, installation, or assessing the condition of an existing cedar fence, visit Preferred Fencing LLC to learn more about available fencing services. Contact us to discuss your specific fence requirements and determine the appropriate next step.
Frequently Asked Questions
How do I restain a cedar fence?
Restaining cedar fence surfaces generally involves inspecting the fence, completing repairs, cleaning the wood, preparing or removing the old finish when necessary, allowing the cedar to dry, and applying a compatible exterior stain according to the manufacturer’s instructions.
Do I need to remove old stain before restaining cedar?
Not always. If the old stain is still in good condition and compatible with the new product, cleaning and maintenance staining may be possible. Peeling, flaking, thick, or incompatible finishes may require more extensive removal or preparation.
How long should cedar dry before restaining?
Drying time depends on recent weather, humidity, temperature, airflow, and the stain manufacturer’s requirements. Follow the product guidance rather than relying on one fixed drying period for every fence.
Can I apply new stain over faded cedar stain?
In some cases, yes. The existing finish should first be inspected for condition and compatibility. A faded but stable stain may need cleaning before maintenance, while a failing finish may require additional preparation.
What is the best type of stain for a cedar fence?
The best option depends on the desired appearance and condition of the cedar. Transparent stains preserve more natural color, semi-transparent stains provide additional color while showing grain, and solid stains offer greater coverage and a more uniform appearance.
How can I avoid lap marks when staining a cedar fence?
Work in manageable sections and, where possible, complete an entire board or continue to a natural break. Maintaining a consistent application method can also help reduce visible differences.
Should I pressure wash a cedar fence before staining?
Cleaning can be important before staining, but aggressive pressure can damage wood fibers. Use an appropriate cleaning method for cedar and follow the recommendations for the cleaning and staining products being used.
Can I restain cedar if it has mildew?
The surface should be properly cleaned before staining. Mildew and other organic buildup can interfere with stain performance and create an uneven appearance.
How do I know when my cedar fence needs restaining?
Common signs include fading, uneven color, surface wear, and changes in how the wood handles water. Regular inspection is more useful than following one universal schedule.
Is it better to repair a cedar fence before restaining?
Yes. Structural concerns such as damaged boards, loose components, leaning posts, or gate problems should generally be addressed before applying a new stain. Stain can refresh appearance but does not repair significant structural damage.